11 Coiffures Nœud Papillon avec Tutoriels
Do you love the bow hair trend but feel intimidated by the prospect of attempting the style on your own hair? You’re not alone! The good news is that most bow coiffures look more difficult to pull off than they actually are, and a little time and practice will have you feeling like an expert. To help make your bow coiffures dreams a reality, we’ve compiled our favorite 10 styles along with tutorials on how to get the look at home. Enjoy!


Browse the Collection
Explore every look in this curated collection.
1Simple High Bow
Tie hair in a queue de cheval haute, but stop short of pulling all the way through, and leave at least a few inches of ends loose, pointing towards your forehead instead of the nape of your neck. Next, fan the folded portion of hair so that it divides into two equal portions. Grab the loose end of your queue de cheval, and fold back in between the parted sections of hair that are looped into the queue de cheval. Finally, secure with pins, and make slight adjustments to get your perfect bow shape.
2semi-attaché Bow Style
This semi-attaché style is great for a more low key, casual day. Begin by tying hair from the ears up in a queue de cheval that sits at the back of the head, leaving some hair in a loop instead of pulling all the way through. Part this loop in half and use the loose portion of the queue de cheval to wrap around and in between, then pin into place. At this point you’ll have a rather limp looking bow, and you’ll need to pin each end of the bow to the back of your head to really bring the style together.
3Big queue de cheval Bow
For this big bow style, start by creating a queue de cheval at the back of your head, then use a piece of hair to wrap around and conceal the elastic. Next, pick up about one quarter of the queue de cheval, and use an elastic to tie it into a loop. Use a similar sized piece to create a second loop next to it, and pin each loop down against the head. Take a thin piece from the remaining loose section of the queue de cheval, and wrap it between the two loops, securing with pins.
4coiffé décoiffé High Bow
This coiffé décoiffé bow style looks especially great on long, cheveux épais. Tie hair fairly high on the head, securing into a large folded bun that leaves only a few inches of hair loose at the top of the head. Divide your folded bun in half, and use the loose piece to complete the bow.
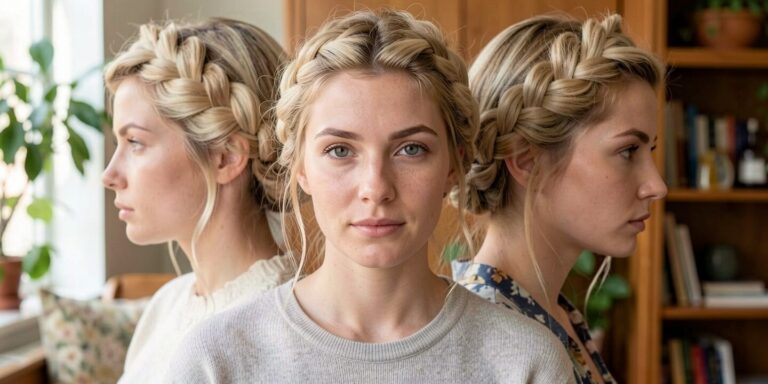
5French tressé Back Bow
For tresses françaises enthusiasts who are crazy about bows, this style puts the two together. Begin by creating a tresses françaises from the nape of the neck towards a crown. This part can be difficult, and will take some practice to be able to do on your own. Once you or a friend have finished the tresse, secure all hair in a queue de cheval, without pulling all the way through. Part the looped portion of hair in half, and use a section of loose hair to wrap in between, defining the bow. Use the remaining loose hair to wrap around the base of the bow for added definition, and pin into place as needed.
6Lady Gaga Bow Style
Ce look is inspired by Gaga’s iconic hair bow, but is more of an chignon than the singer’s « Poker Face » era style. Like most bow styles, it’s formed from a folded bun that gets parted in half, then wrapped and secured with the remaining loose hair. By leaving some loose frange in the front, this bow style comes across as a bit softer and more casual.
7Side Leaning Top Bow
Ce style puts a little twist on the classic bow coiffures by setting the originating queue de cheval off to the side. Create a fairly small loop in your pony so that the sides of your bow don’t flop over, and wrap the long end of your queue de cheval around to complete your bow.
 8
8Perfect Present semi-attaché Bow
Nous adorons how this semi-attaché bow style leaves a long piece trailing to look like the ends of a festive ribbon! Begin by parting hair from the ears up, and tying into a queue de cheval, but stop with hair only a few inches pulled through. Unlike most bow styles, you’ll want to leave a longer piece trailing loose at the end. Fan apart and divide the looped portion of hair in half, pinning each side down to the back of the head. Finally, wrap the longer piece around the middle, letting the ends fall loose underneath your bow.
 9
9Bun With Side Bow
Instead of using all of vos cheveux to make the bow, this style ends up looking like a bun with a neat little hair bow holding it in place. Start by tying hair in a queue de cheval haute, then create a loop with the top section, and fan it out to create your bun. Use remaining loose hair to create a second loop, leaving some hair loose at the ends as well. This second loop will be used to create your bow: fan apart and divide the loop in half, then use the remaining loose piece of hair to wrap between, and pin everything in place. You may need to experiment with different sizes of ponytails in this style to find what works best for your specific hair length!
 10
10Bow tresses Style
The most complicated style on our list, you’ll need to start this one out by creating a diagonal tresses françaises on one side of the head, securing with pins or an elastic for extra hold. To begin creating bows, take a section of loose hair from the other side of your head, and create a loop, securing with the closed end of a bobby pin. Use the pin to pull this loop of hair underneath the tresse, while using your other hand to keep one loop on the side you started on. Continue this method to loop as many bows as you’d like through your tresses françaises, and keep in mind that a tighter tresses françaises will do a better job at keeping bows securely in place.